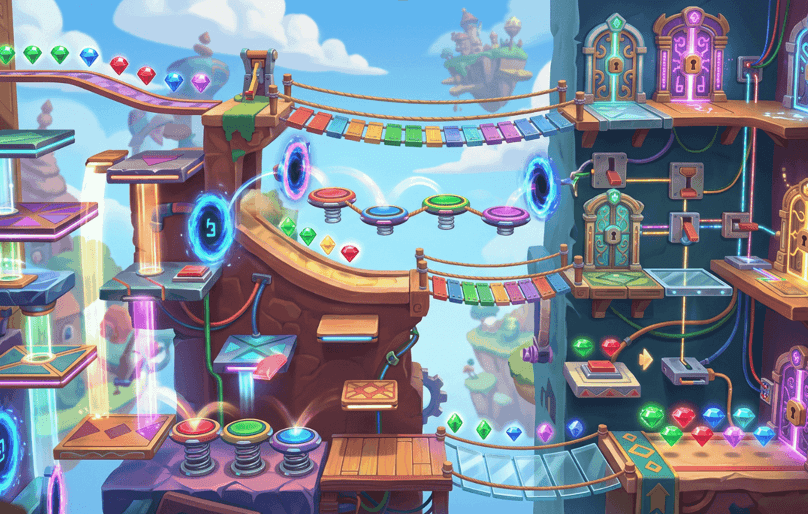
Making your first online game alone can feel overwhelming. You may have an idea for a platformer, puzzle game, shooter, racing game, or arcade challenge, but no programmer, artist, sound designer, or producer to help you build it.
The good news is that solo game development is more accessible than it used to be.
AI-assisted tools, no-code platforms, visual editors, and browser-based publishing have reduced the technical barrier for beginners. You can now start with a simple concept, create a playable prototype, test it with real players, and improve it without building a large team first.
That does not mean creating a complete commercial game is effortless. You still need to make decisions about the player experience, controls, level design, difficulty, visuals, testing, and publishing.
The key is to start with a small project that you can understand and finish.
Decide what your first game is really about
Before opening a game builder, write one sentence that explains the main experience.
For example:
Create a short 3D obstacle game where players jump across moving platforms, collect gems, and unlock new challenges.
This sentence is useful because it identifies the core action. The player jumps, collects, and progresses.
Avoid starting with a description like:
Make a huge adventure game with many characters, a large world, multiplayer, quests, pets, vehicles, weapons, and a deep story.
That may be an exciting long-term vision, but it is too broad for a first solo project.
A first game should usually have:
- One main mechanic
- One clear objective
- A small number of levels
- Simple controls
- A short play session
- One basic reward or progression system
- A clear way to restart or continue
You can always expand the project later. Your first goal is to prove that the main idea is playable.
Choose a development method that matches your skills
You do not have to choose the most advanced tool. Choose the method that lets you make progress without becoming stuck.
AI-assisted game creation
AI game makers allow you to describe mechanics and gameplay in natural language. They can help create a first version of the game, generate basic systems, and suggest changes.
This is useful when you:
- Have no coding experience
- Want to test several ideas quickly
- Need help creating a prototype
- Prefer describing ideas instead of using a traditional engine
No-code visual tools
No-code platforms use visual editors, drag-and-drop objects, sliders, and logic blocks. You may still need to understand game design, but you do not have to write programming syntax.
This approach can give you more direct control over:
- Player speed
- Gravity
- Collision settings
- Enemy behavior
- Level layouts
- Rewards
- Game rules
Traditional game engines with AI assistance
A traditional engine gives you more control but usually has a steeper learning curve. AI can help explain the interface, write small scripts, troubleshoot errors, and organize systems.
This route may be better if you want to learn development deeply or eventually build a larger project.
A hybrid approach
Many solo creators use a combination of methods. They may use AI to generate an early concept, visual tools to adjust the game, and traditional software for custom art, sound, or publishing.
The best workflow is the one that helps you keep moving.
Build the core gameplay loop first
The core gameplay loop is what the player repeats throughout the game.
For a platformer, the loop might be:
- Move through a level.
- Jump across obstacles.
- Collect an item.
- Avoid a trap.
- Reach the end.
- Unlock another challenge.
For a puzzle game, it might be:
- Study the layout.
- Make a move.
- Observe the result.
- Adjust the strategy.
- Solve the challenge.
- Advance to the next puzzle.
For a survival game, it could be:
- Defeat enemies.
- Collect resources.
- Upgrade an ability.
- Face a stronger wave.
- Try to survive longer.
Do not add a large number of features before this loop feels enjoyable. A game with one good mechanic is more promising than a game with twenty weak systems.
Create a short design brief
Once you know the core loop, create a simple design brief. It does not need to be a long document.
Write down:
Player role
Who does the player control?
Main action
What does the player do most often?
Objective
What does the player need to achieve?
Difficulty
What makes the game challenging?
Progression
What changes as the player continues?
Visual direction
Should the game look colorful, minimalist, realistic, retro, futuristic, or cartoon-like?
Session length
Should one round take two minutes, ten minutes, or longer?
Failure condition
What happens when the player makes a mistake?
This brief gives you a reference point whenever the project starts becoming too complicated.
Use AI prompts that describe player behavior
AI tools work better when you explain what the player should experience instead of only naming a genre.
Weak prompt:
Make a challenging obby game.
Stronger prompt:
Create a 3D obstacle course for solo players. The player moves through short stages filled with jumps, moving platforms, traps, and gaps. Add gems that encourage exploration and a visible progress indicator. Make the first level easy enough to teach the controls, then gradually increase the difficulty. Include a restart button and clear feedback when the player completes a stage.
The stronger prompt explains:
- The game format
- The player’s movement
- The obstacles
- The rewards
- The difficulty curve
- The interface
- The success condition
You can improve the result by adding one feature at a time.
Try prompts such as:
- Make the first level easier without changing the controls.
- Add two moving platforms to the next stage.
- Make the traps easier to see before the player reaches them.
- Add a checkpoint halfway through the level.
- Increase the reward for taking a risky route.
- Keep the current layout but add a time challenge.
- Add a simple unlockable cosmetic reward.
Keep your first online game small
Many first-time creators make the same mistake. They start with a project that requires too many systems.
A manageable first project might contain:
- Three to five levels
- One player character
- One control scheme
- Two or three obstacle types
- One collectible
- One simple progression system
- One completion screen
- One restart option
This is enough to teach you important lessons about movement, level design, difficulty, rewards, and testing.
If you later decide to add pets, character customization, multiple worlds, leaderboards, or community features, you will already understand the basic structure.
An obstacle-course example
MEGA OBBY is described as a vibrant 3D platformer with 40 challenging obstacle courses focused on precision, timing, and patience. Players collect gems, unlock pets, and progress through stages containing jumps, traps, and moving platforms.
For a solo creator, this type of game can be divided into manageable milestones.
Milestone one: movement
Create a character that can move, jump, and land on platforms.
Milestone two: one obstacle
Add a gap, moving platform, or simple trap.
Milestone three: a complete level
Build a short stage with a beginning, middle, and finish.
Milestone four: rewards
Add gems or another collectible that gives players a reason to explore.
Milestone five: progression
Create several stages with gradually increasing difficulty.
Milestone six: optional customization
Add pets, cosmetics, or other rewards only after the main platforming feels satisfying.
The supplied summary describes the gameplay structure, but it does not confirm the game’s creator, development team, tools, or publishing process. Use it as a design reference rather than assuming how it was made.
Make your controls feel good before adding more content
Players forgive simple graphics more easily than frustrating controls.
Whether your game uses keyboard, mouse, touch, or a controller, test:
- Movement responsiveness
- Jump timing
- Turning speed
- Camera behavior
- Collision accuracy
- Button placement
- Recovery after mistakes
- Restart speed
If the player jumps too late because of input delay, the level may feel unfair. If the camera hides an obstacle, failure may feel random. If restarting takes too long, players may leave instead of trying again.
Test the controls before spending time on decorative details.
Design levels around learning and mastery
Good levels teach the player before demanding difficult execution.
A simple progression might look like this:
Level one: introduce the movement
Use wide platforms and few hazards.
Level two: add timing
Introduce moving platforms or platforms with short gaps.
Level three: add risk
Place collectibles along optional routes or near hazards.
Level four: combine mechanics
Use jumps, traps, moving objects, and changing platform positions.
Level five: test mastery
Require the player to use everything learned so far.
Difficulty should increase because the player is making more demanding decisions, not because the level becomes confusing.
Use placeholder assets at the beginning
You do not need perfect graphics for your first playable version.
Simple shapes can represent:
- The player
- Platforms
- Enemies
- Collectibles
- Hazards
- Doors
- Checkpoints
This lets you test the game before spending time on art.
Once the gameplay works, replace placeholders with a consistent visual style. Choose colors that make important objects easy to recognize. Avoid adding visual effects that make hazards blend into the background.
A polished game is not necessarily the one with the most details. It is the one where every visual element helps the player understand what is happening.
Test your game with people who have not seen it
You already know how your game works, so you are not the best judge of whether the instructions are clear.
Ask someone else to play without giving them help. Watch what happens.
Do they:
- Understand the objective?
- Find the controls?
- Know where to go?
- Recognize hazards?
- Understand why they failed?
- Notice the rewards?
- Want to try again?
Do not interrupt immediately. Confusion reveals where the game needs better communication.
You can also ask specific questions afterward:
- What did you think the goal was?
- What part felt most difficult?
- Did anything feel unfair?
- Which reward did you notice?
- Would you play another level?
- What would you change?
This feedback is more valuable than simply asking whether they liked it.
Plan for online publishing early
If you want to create an online game, decide where players will access it.
You may want:
- A browser-playable version
- A shareable link
- Mobile support
- Desktop support
- A platform page
- A community discovery section
- An embeddable version for a website
Some AI and no-code platforms now emphasize browser creation, instant testing, sharing, and export options. SoonLab, for example, describes a workflow for creating, testing, and sharing browser-based game prototypes, while other platforms focus on exporting projects to additional devices.
Check the platform’s current terms before building a project around it. Important questions include:
- Do I own the game?
- Can I export it?
- Can I monetize it?
- Are there generation limits?
- Does it support accounts or saved progress?
- Can players access it without installing anything?
- Does it handle analytics or player data?
- Are there publishing fees?
A prototype is easier to share when the access process is simple.
Common mistakes solo creators should avoid
Starting with a huge world
A large map is not useful if the main mechanic is not enjoyable.
Adding rewards too early
Collectibles and unlocks should support the gameplay, not distract from weak controls.
Making every level difficult
Players need time to understand the rules before facing advanced challenges.
Ignoring mobile screens
If you want online players from different devices, test layouts on smaller screens.
Changing everything at once
Request one focused update at a time so you can identify what improved or broke.
Publishing without testing
A game may work on your device but fail on another browser, phone, or computer.
Copying another creator’s work
Take inspiration from genres and mechanics, but use original names, visuals, levels, and presentation.
See also: Top Portable Grills for Camping and Tailgate Season
A realistic solo development plan
You can divide your first project into four phases.
Phase one: concept
Choose the mechanic, objective, audience, and visual direction.
Phase two: prototype
Build one playable level and test the controls.
Phase three: expansion
Add more levels, rewards, hazards, and progression.
Phase four: release
Test different devices, improve instructions, prepare the game page, and share it with players.
Do not move to the next phase until the previous phase works well enough.
Astrocade’s current platform direction also makes this type of creator workflow more approachable by connecting game creation and game discovery in one environment. The benefit for a beginner is the ability to move from an idea to a playable concept before investing in a large production process.
Making an online game alone is no longer limited to experienced programmers. Modern AI and no-code tools can help you move from a simple idea to a playable prototype much faster.
The most important decision is not which tool you choose. It is whether you can keep the project small enough to finish, test it honestly, and improve it based on how real players respond.